How to connect to an existing dropbox. How to use two Dropbox accounts on the same computer
The easiest way to access two different accounts Dropbox - download the application for the main account, and enter the additional account through the browser. The web version of Dropbox will give you access to all the files in your secondary account, and will also allow you to use the basic functions of the service, such as uploading files and creating folders.
Of course, this method is not very convenient. In addition, you lose synchronization in the background. But if you need to use an additional account only occasionally, then this is the easiest solution.
Use shared folders

The downside to this approach is that Dropbox doesn't allow sharing of the root folder. You will need to place all files in a shared folder that will take up space on both accounts. In this case, you will not be able to get additional space, but you can avoid trouble with your personal and work account.
1. Create a second Windows user (if you don't already have one). If you're only creating this account to bypass Dropbox restrictions, don't link it to a Microsoft account.

2. Sign in to an additional Windows account without leaving the main one. To do this quickly, just press the Windows + L buttons.
3. Download and install the Dropbox for Windows app. To log in, use the username and password from the second account.
4. Return to the main Windows account and go to the "Users" folder. By default, it is located on the same drive as the operating system.
5. Then go to the folder of the user you just created. In the window that appears, click "Continue" to access your files with administrator rights.
6. Go to your Dropbox folder. For convenience, you can create a shortcut to this folder and place it on your desktop.

Please note that in order to synchronize your account with the Dropbox server, you will have to sign in to a secondary Windows account each time, and then return to the main one again.
1. First, make sure you've downloaded, installed Dropbox, and signed in to your main account.
2. Then create a new Dropbox folder in your personal Home folder. For example, let's call it Dropbox2.

3. Open the program (use Spotlight in the top right corner if you can't find it). Click Process, then Select.

4. In the "Library" submenu, scroll down the page until you see the entry "Run shell script". Drag the entry to the right window.

5. Copy the script below and paste it into the text box. Replace Dropbox2 with the name of the folder you created earlier.
HOME=$HOME/Dropbox2 /Applications/Dropbox.app/Contents/MacOS/Dropbox &
6. Now click "Launch". A new copy of the Dropbox app will appear, allowing you to sign in to a secondary account and set it up.
Reading time: 39 min
Perfectly describes such an expression as "cloud storage". Dropbox is a service that allows you to transfer files to the server, which will be stored in the cloud. Thus, it is possible to store individual data in a remote location and secure it against loss in the event of a failure on the PC.
Dropbox to PC: Key Features
To fully use the program, you will have to buy Dropbox, then the whole arsenal of features will be available. The main limitation in the free version is the small amount of allocated memory. To expand or limitless use of the resource's memory, you will have to pay a price, $ 10 for 50 GB or $ 20 for 100 GB, but the pricing policy is gradually changing.

Dropbox has the following benefits:
- Dropbox allows you to store data on the Internet, so the concern for the safety of documents is transferred to the service, and even if Windows fails, the information will still remain. In addition, for third-party eyes, without your desire, files will not be available;
- You can access files from another device or share data between multiple people, but you need to set up account permissions or specify sharing when uploading a file. So you can get a link to the file and pass it to the user for use;

- The free program provides only 2 GB of memory for use. There are also special promotions and bonuses, so it’s really possible to increase the volume up to 25 GB without making a payment;

- The application is integrated into the system, so after installing Dropbox, a separate folder appears on the computer, all the contents in it are synchronized with the server. It's so easy to edit the content, but be aware that the transfer speed is much slower due to the Internet connection;
- Branching system. Many firms that work remotely use a similar branching system. A popular service is Git, so it is possible, if necessary, to find a file that has been deleted or edited earlier, because there is a version backup. A less functional system is contained in Dropbox, but this is probably enough;
- The data on the server is stored as is, that is, no encryption is used. In general, this can hardly be called a disadvantage, since, since this is not implemented, it means that already reliable information protection is provided. If you want to encrypt data, a specialized application will help, an alternative option is to archive files with a password.
Based on the listed properties, you should determine whether the Dropbox program is specifically for you. In general, the application is of very high quality and originates from the beginning of the existence of cloud storage and today occupies its rightful place in the lives of users.
How to install Dropbox?
You must first download Dropbox to your computer and other devices. To fully use the service, registration is required, it is basic and does not cause any difficulties. Download link .

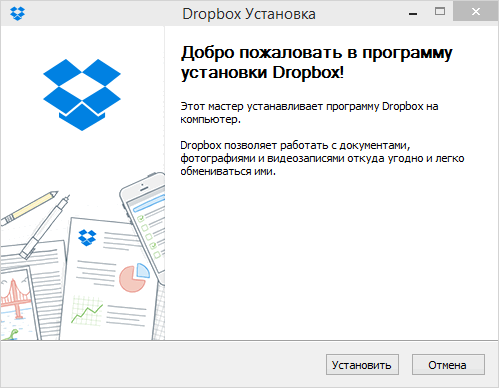
It is convenient that immediately after installing the application, a small presentation is launched, an animated instruction for use.
Immediately after the acquaintance, a folder will open that contains the guide file. It is this directory that is the link for using the cloud. By uploading, deleting, editing files here, they are automatically synchronized in the background with the data on the server.
In the notification menu, the program icon (open box) is indicated, clicking on it will show the latest synchronization procedures, that is, a small report.
To set up the application you need:
- Click on the icon in the notification panel;
- Next, in the window, click on the gear and select "Settings";

- In total there are 5 tabs for settings:
- General - basic settings for displaying notifications and the program language;
- Account - allows you to manipulate the profile;
- Import - specifies whether it is necessary to download modified versions of files from the repository if they were downloaded by someone else;
- Bandwidth - allows you to set a limit on the amount of traffic consumed so that the cloud does not interfere with comfortable work at the computer;
- Proxy servers - allow you to use third-party machines to hide your personal address.
Not only with the help of the application you can access your data, the cloud also has a web interface. Here you also need to log in. Further, detailed information on file manipulations will be indicated, they can be downloaded through the browser.
Read also: How to disable or remove OneDrive in Windows 10?
Uninstalling a program
If you do not need such an application or want to replace it with an alternative, then you should uninstall Dropbox. To uninstall an application, you can use the standard option:
- Click on the Dropbox icon;
- Expand the options and select "Exit";

- Go to the "Programs and Features" section located in the "Control Panel";
- Select the appropriate Dropbox item and "Delete".

Note that even after uninstalling the program, the data will not disappear at all, they will be available if you go to the site or install the application again. The information is tied to an account, so you can only access it from that account if it's not shared.
Thus, you can easily use cloud storage and prevent data loss even due to serious system or HDD failure. Ease of use, functionality and security - all this is the undeniable advantage of Dropbox among other services with similar functionality.
If you still have questions on the topic "Dropbox - what kind of program is it and how to install it?", You can ask them in the comments
It does not need to be introduced - it allows you to automatically synchronize local files with cloud storage. Describe the process of registering and installing client software, I believe, is also not necessary. The process is simple, well-documented, and there are numerous reviews of Dropbox features available online. Instead, we will focus on less obvious things.
Launching a Second Dropbox Instance
The creators of the service proceeded from the assumption that the user launches only one Dropbox client during a session with the operating system. It’s hard to blame them for this - it’s hard to imagine the situation of simultaneously connecting to the service with another account, and with one it doesn’t make sense at all. Nevertheless, discussions of this issue often arise in the forums, so let's try to figure it out.
The Dropbox client is launched in Windows as a regular user program using a shortcut placed in startup. Simply changing the working directory does nothing, and the only way out here is to make a copy of the shortcut to run it as a different user. An account must first be created through the control panel.
On Windows XP it looks like this
The method has another interesting application: if several people work on the computer with different accounts, then they can use the installed Dropbox instance independently of each other (there is no need to change the properties of the shortcut).
When you try to launch the client program for the first time, it asks you to enter your Dropbox login and password. All setup steps are standard here, but you should pay attention to the choice of the directory for synchronization - by default it will be in the profile of the user on whose behalf you run the client. If this does not suit you, then instead of automatic configuration (Typical), you need to select manual (Advanced) and specify the directory yourself.
As a result of simple manipulations, we got two instances of the Dropbox program, working simultaneously and with different service accounts. There are also two directories for synchronization - in the My Documents folder and on the desktop.
 Two Dropbox client instances and two directories on Windows XP
 There may be nuances with file access rights, but for home users they are not critical, since they work on the system with administrator rights and have full access to the disk. Another issue is autorun. For example, in Windows XP, it was not possible to find a regular way to automatically start the program on behalf of another user using a shortcut. The issue is solved by third-party utilities, of which there are many.
Sync files outside of the Dropbox directory
Dropbox is purely for syncing files over the network and doesn't know anything about app data (unlike some proprietary services like iCloud or Ubuntu One). In addition, it works with a special directory on the local machine and cannot synchronize data outside of this directory. On Linux, the problem is solved by creating a Dropbox folder inside - let's try to do the same on Windows.
The most interesting question here is how correctly Dropbox for Windows will perceive a soft link, which is an independent object of the file system, somewhat reminiscent of a shortcut. The screenshot shows that everything went well - the program perceives the symlink as a directory and uploads its contents to the server.
You can achieve similar results in other ways - by creating hard links to files or, say, by mounting partitions inside the Dropbox directory. As for these applications, there are also options here: for example, you can make a symbolic link to the Thunderbird profile in the synchronized folder - and a backup copy of your mail will be in the cloud.
Dropbox is the world's first and most popular cloud storage service. This is a service thanks to which each user can store any data, be it multimedia, electronic documents or anything else, in a safe and secure place.
Security is by no means the only trump card in the Dropbox arsenal. After all, this is a cloud service, which means that all the data added to it goes to the cloud, remaining tied to a specific account. Access to files added to this cloud can be obtained from any device on which the Dropbox program or application is installed, or simply by logging in to the service website through a browser.
In this article, we will talk about how to use Dropbox and what this cloud service can do in general.
Installing this product on a PC is no more difficult than any other program. After downloading the installation file from the official site, just run it. Then follow the instructions, if you wish, you can specify the location for installing the program, as well as specify the location for the Dropbox folder on your computer. It is in it that all your files will be added and, if necessary, this place can always be changed.
Create an account
If you still do not have an account in this wonderful cloud service, you can create one on the official website. Here everything is as usual: enter the name and surname, address Email and create your own password. Next, you need to check the box, confirming your acceptance of the terms of the license agreement, and click "Register". Everything, the account is ready.

Note: The created account will need to be confirmed - an email will be sent to the mail, from which you will need to follow the link.
Setting
After installing Dropbox, you will need to log into your account, for which you need to enter your username and password. If you already have files in the cloud, they will be synchronized and downloaded to your PC, if there are no files, an empty folder will simply open that you assigned to the program during installation.
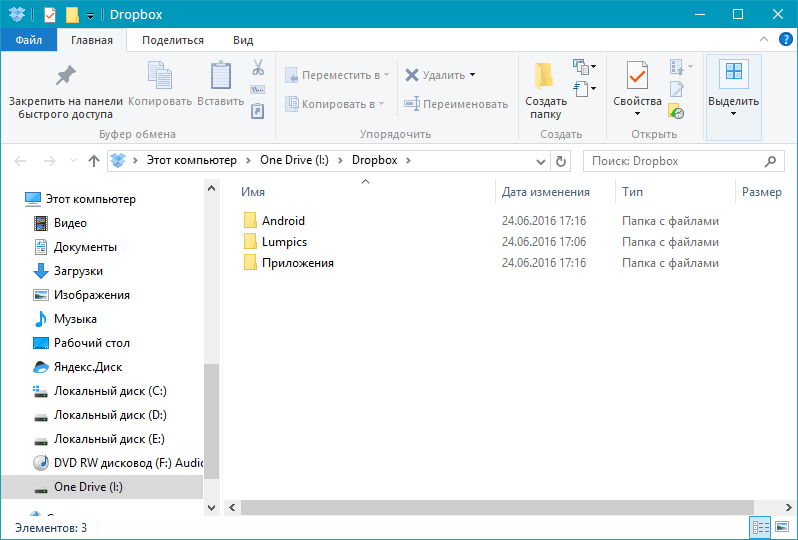
Dropbox runs in the background and minimizes to the system tray, from where you can access the latest files or folder on your computer.

From here you can also open the program options and make the desired settings (the "Settings" icon is located in the upper right corner of the small window with the latest files).
As you can see, the Dropbox settings menu is divided into several tabs.

In the "Account" window, you can find the sync path and change it, view user data and, most interestingly, adjust the sync settings (Selective Sync).

Why is this needed? The fact is that by default, all the contents of your Dropbox cloud are synchronized with your computer, downloaded to it in the designated folder and, therefore, take up space on your hard drive. So, if you have a basic account with 2 GB of free space, this most likely does not matter, but if you, for example, have a business account with up to 1 TB of cloud space, you are unlikely to want all this terabyte also took up space on the PC.

So, for example, you can keep important files and folders synchronized, documents that you need in constant access, and bulky files can not be synchronized, leaving them only in the cloud. If you need a file, you can always download it, if you need to view it, you can also do it on the web by simply opening the Dropbox website.

By going to the "Import" tab, you can configure the import of content from mobile devices connected to a PC. By activating the camera upload function, you can add photos and videos stored on your smartphone or digital camera to Dropbox.
Also, in this horse, you can activate the function of saving screenshots. The screenshots you take will be automatically saved to the storage folder as a ready-made graphic file, to which you can immediately get a link,

In the Bandwidth tab, you can set the maximum allowed speed at which Dropbox will sync the added data. This is necessary in order not to load the slow Internet or simply make the program work inconspicuously.
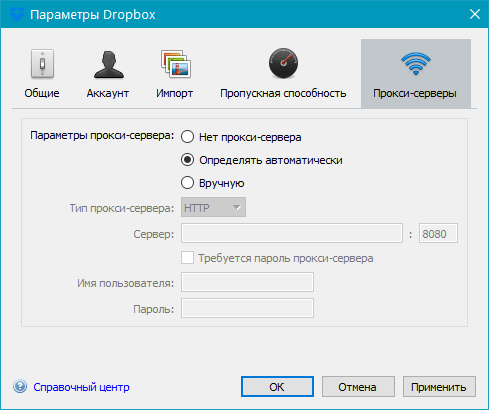
In the last settings tab, if desired, you can configure a proxy server.
Adding files
To add files to Dropbox, simply copy or move them to the program folder on your computer, after which synchronization will begin immediately.

You can add files both to the root folder, and to any other that you can create yourself. You can also do this through the context menu by clicking on the required file: Send - Dropbox.

Access from any computer
As mentioned at the beginning of the article, files in the cloud storage can be accessed from any computer. And for this it is by no means necessary to install the Dropbox program on your computer. You can simply open the official website in the browser and log in to it.

Directly from the site, you can work with text documents, view multimedia (large files can take a long time to load), or simply save the file to a computer or a device connected to it. The account owner can add comments to Dropbox content, link to users, or publish these files on the web (for example, on social networks). 
The built-in site viewer also allows you to open media and documents in viewing tools installed on your PC.

Access from a mobile device
In addition to the program on the computer, Dropbox also exists in the form of applications for most mobile platforms. It can be installed on iOS, Android, Windows Mobile, Blackberry. All data will be synchronized in the same way as on a PC, and the synchronization itself works in both directions, that is, you can add files to the cloud from your mobile in the same way.

Actually, it should be noted that the functionality mobile applications Dropbox is close to the capabilities of the site and in all respects surpasses the desktop version of the service, which in fact is only a means of access and viewing.

General access

Note: if you want to allow someone to view a particular file or download it, but not edit the original, just provide a link to this file, and do not share it.
File sharing function
This possibility follows from the previous paragraph. Of course, the developers conceived of Dropbox solely as a cloud service that can be used for both personal and business purposes. However, given the capabilities of this storage, it can also be used as a file sharing service.

So, for example, you have photos from a party where there were a lot of your friends, who, of course, also want these photos for themselves. You just share them, or even provide a link, and they already download these photos to their PC - everyone is happy and grateful for your generosity. And this is just one of the applications.
Dropbox is a world-famous cloud service that can be found in a lot of use cases, not limited to what its authors intended. It can be a convenient storage of multimedia and/or work documents aimed at home use, or it can be an advanced and feature-rich business solution with large capacity, workgroups and extensive administration options. In any case, this service deserves attention, if only for the reason that it can be used to exchange information between various devices and users, as well as simply save space on your computer's hard drive.
The article will be useful to those who do not use this cloud storage. You may not even have installed it. Dropbox can be installed along with other applications. As a result, it constantly starts up, takes up disk space and interferes with the normal operation of the PC.
We offer simple instructions on how to remove the Dropbox cloud from your computer. And recently we wrote OneDrive pre-installed on the "top ten".
Universal way
This method is relevant for all Windows users. You need to go to the Control Panel and find the "Programs and Features" section.
But we will do it easier. Press the key combination Win + R and write the command in the line appwiz.cpl. The desired section of the panel will open automatically. Here we need to select the "Uninstall a program" menu.
We act as follows: we find the Dropbox program in the list, select it - and click "Delete".
Through Windows 10 Settings
Users of "tens" can remove the application from the standard settings. You can enter them by pressing the key combination Win + I.
Third party software
Special uninstallers will help you remove the Dropbox cloud. We have the popular CCleaner installed. We go into the program, select the "Service" section. We will immediately see the "Uninstall programs" tab.
Then we proceed as usual: we are looking for a program, click on "Uninstall". It is important to choose this item. If you select the usual "Delete", then the program icon from the list will simply disappear, and the application itself will not be deleted.
You can use other utilities to remove programs: Revo Uninstaller, IObit Uninstaller, Uninstall Tool, etc. Read more about such utilities.
Note. In all three cases, after clicking "Delete" (or "Uninstall"), the uninstaller will start. You will need to click the "Uninstall" button and wait for the uninstallation to complete.
Deleting a Dropbox folder
After deleting the application, the data folder still remains. Delete it too. Don't be afraid to lose your files, as they are still stored in the cloud and tied to your account. You can restore deleted content at any time. The folder is usually located on the system drive C in the user folder (C:/Users/user_name).
That's how easy it is to delete a Dropbox cloud that you don't use. Read more about uninstalling and installing applications. Also, don't miss the article where we tell you how to from the Microsoft Store.


